4K and Virtual Displays
Our Macs come with a bespoke KVM solution that allows our customers to control their Mac mini even if the device itself is in an unreachable state, right through the browser. This provides peace-of-mind and enables workflows that weren't possible before.
However, this comes with its own challenges. The external KVM simulates one 1080p display and due to the limitations of macOS, this results in Screen Sharing only being possible in 1080p as well. If you want to share a higher resolution than 1080p or share multiple displays at once, additional software is required.
Getting Started With 4K Resolution and Virtual Displays
To enable virtual displays or 4K resolution, the installation of BetterDisplay on the hosted Mac mini is required. For this, execute the following steps:
- Connect to your Mac via Screen Sharing or KVM.
- Open this website in your browser: https://github.com/waydabber/BetterDisplay
- Click the
Download app for macOSbutton and download the app. - Install it by opening the file and copying the BetterDisplay app to the Applications folder.
- Start Better Display through the Applications folder.
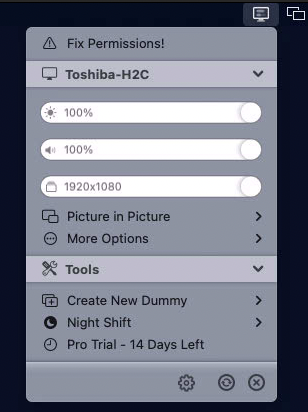
Once installed and started, you should see a new icon appear in the top right corner. Click on it to open the settings. You can ignore the Fix Permissions! notice, as it does not apply to the features needed in our case.

Setting up 4K Resolution
Once BetterDisplay has been installed, we can start setting up virtual displays. To support screen sharing in higher resolutions, you can create a new dummy display:
- Select
Create New Dummy - Select the Aspect Ratio and resolution best for your needs. In most cases, this would be the first entry:
16:9 - HD/4K/5K/6K

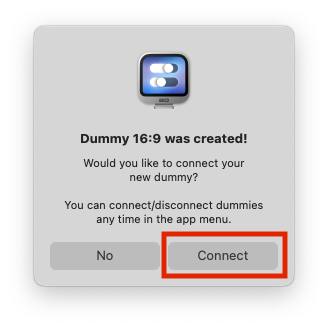
- Once created, you will be asked to connect to the newly created dummy. Click
Connect:

- Navigate to
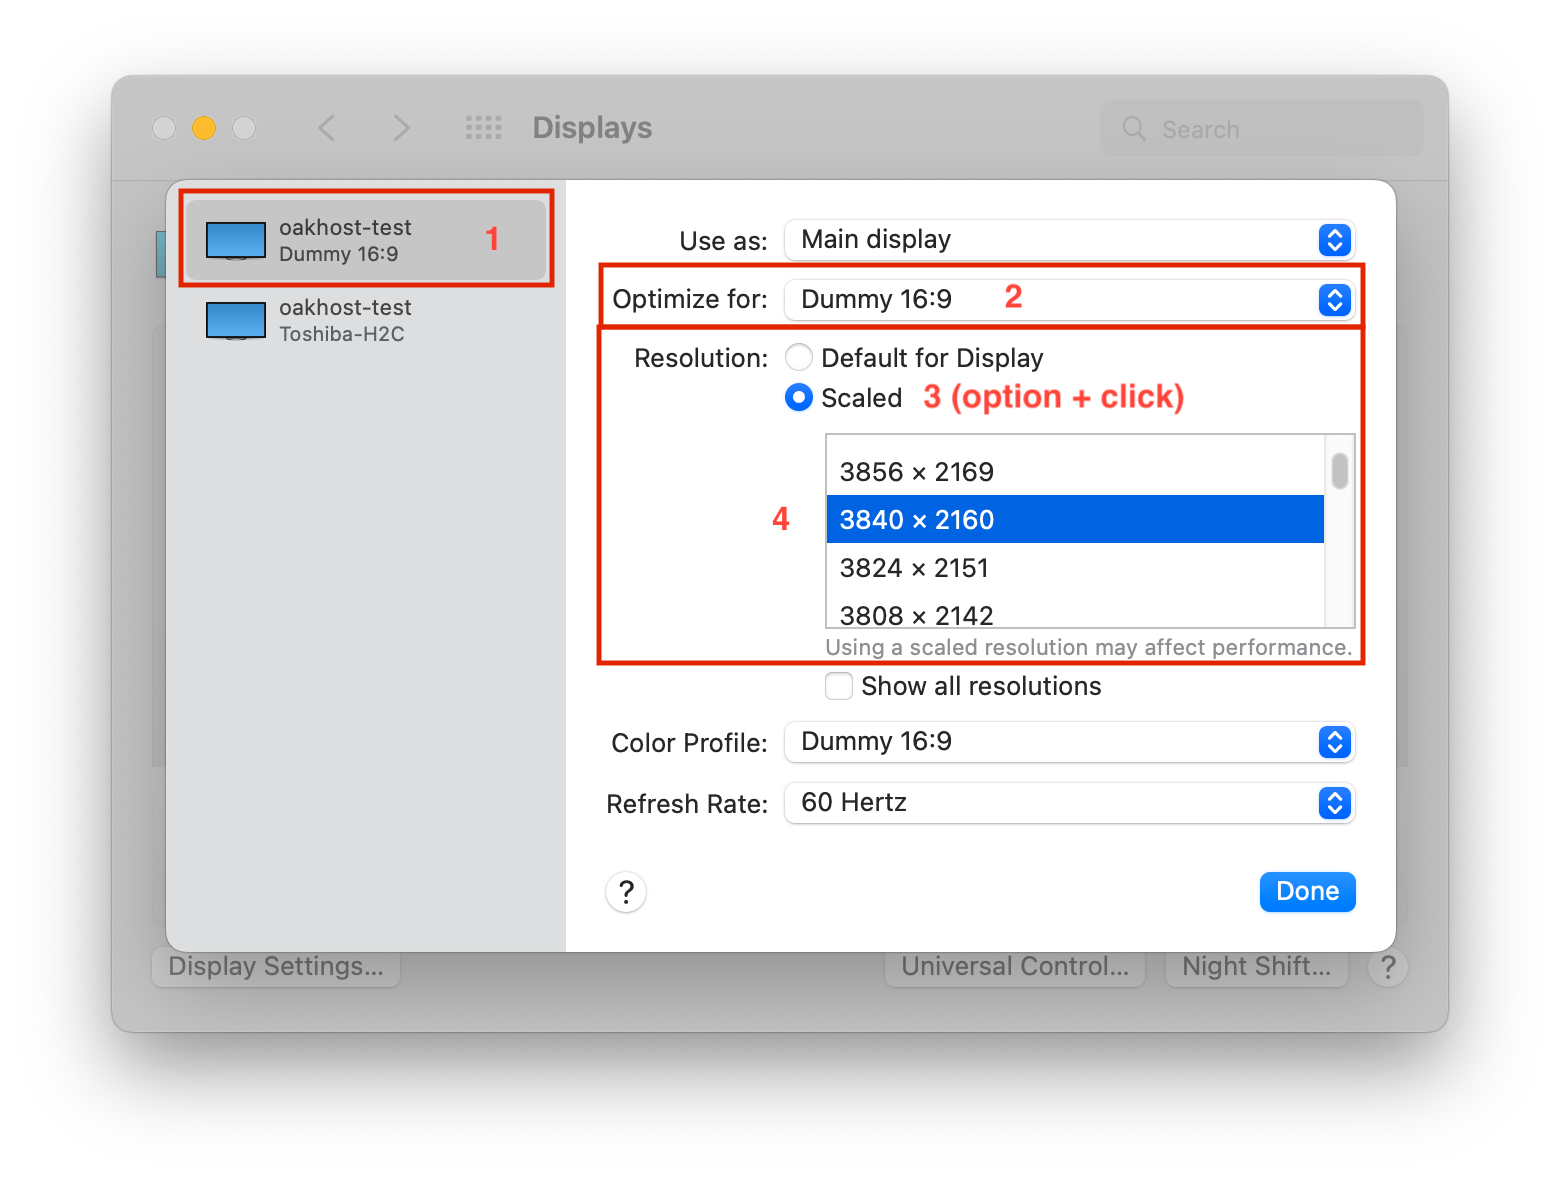
System Settings>Displaysand selectDisplay Settings... - Select the Dummy display.
- Ensure
Optimize for:is set to the Dummy display. Then, hold down theoptionkey on your keyboard and click onResolution: Scaled. This will allow you to specify exactly which resolution you want to select. - Select your preferred resolution. The standard 4K 16:9 resolution is
3840 × 2160.

Setting up Multiple Displays
Once BetterDisplay has been installed, we can start setting up virtual displays. Just like with 4K resolution, we start out by creating a new dummy display:
- Select
Create New Dummy - Select the Aspect Ratio and resolution best for your needs. In most cases, this would be the first entry:
16:9 - HD/4K/5K/6K - Once created, you will be asked to connect to the newly created dummy. Click
Connect:

- You can create multiple dummy displays, depending on how many virtual displays you want.
- Navigate to
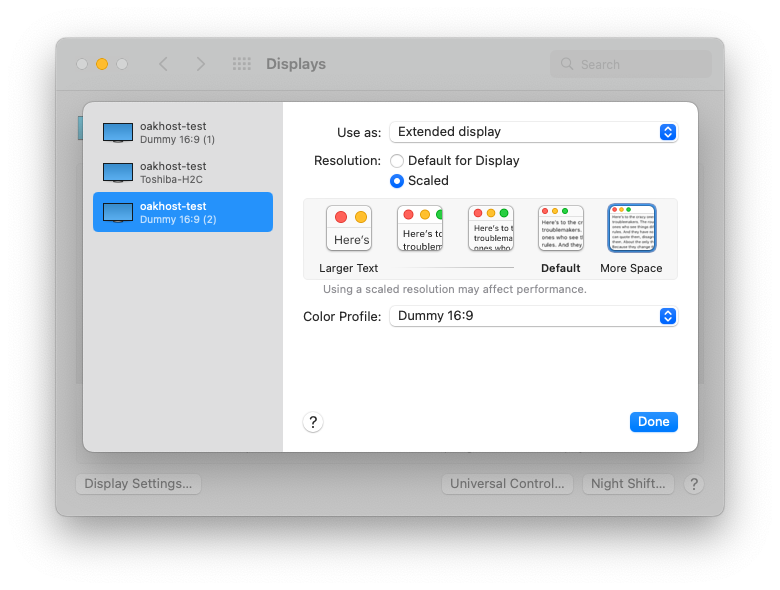
System Settings>Displaysand selectDisplay Settings... - Select the Dummy display.
- Click on the
Use as:dropdown and selectStop Mirroring. This will result in the dummy display to be displayed as a separate screen.

- If you are using Screen Sharing, you will now see the new screen appear next to the other one. You can go to
Viewon your local Screen Sharing app and select the display you would like to see. Please note that on KVM you will only be able to access the default external display. Virtual/dummy displays will not be accessible through KVM. - Continue configuring your dummy displays to your liking, just like you would with normal monitors.
You can permanently lose access to your Macs screens via KVM when configuring multiple displays with BetterDisplay. To avoid this, we recommend to not start BetterDisplay at login. That way, you can always just reboot your Mac through the Customer Panel to reset your changes.

After restarting your Mac, you can just launch BetterDisplay again to apply the previous configuration.
Alternatives
BetterDisplay isn't the only application to support virtual displays. Jump Desktop includes such features by default and allows you to easily mirror your local monitor setup. They also optimize latency and picture quality, which is especially handy for multiple display streams.