Configuring WireGuard as a Server on macOS
WireGuard is a simple VPN application that allows you to remotely access your server or network through a secure tunnel. Normally, a VPN consists of a server and a client. With WireGuard, they're the same thing. The only difference is the configuration. So let's have a look.
Downloading WireGuard
On macOS, WireGuard can be downloaded through the AppStore. You will need the same application for the server, as well as the client(s) connecting to it. If your client is not a Mac, you can find more download options on the official website - they offer clients for every OS.
To access your server, either connect using VNC or through our KVM module.
Once started up, you will be greeted with the following interface:
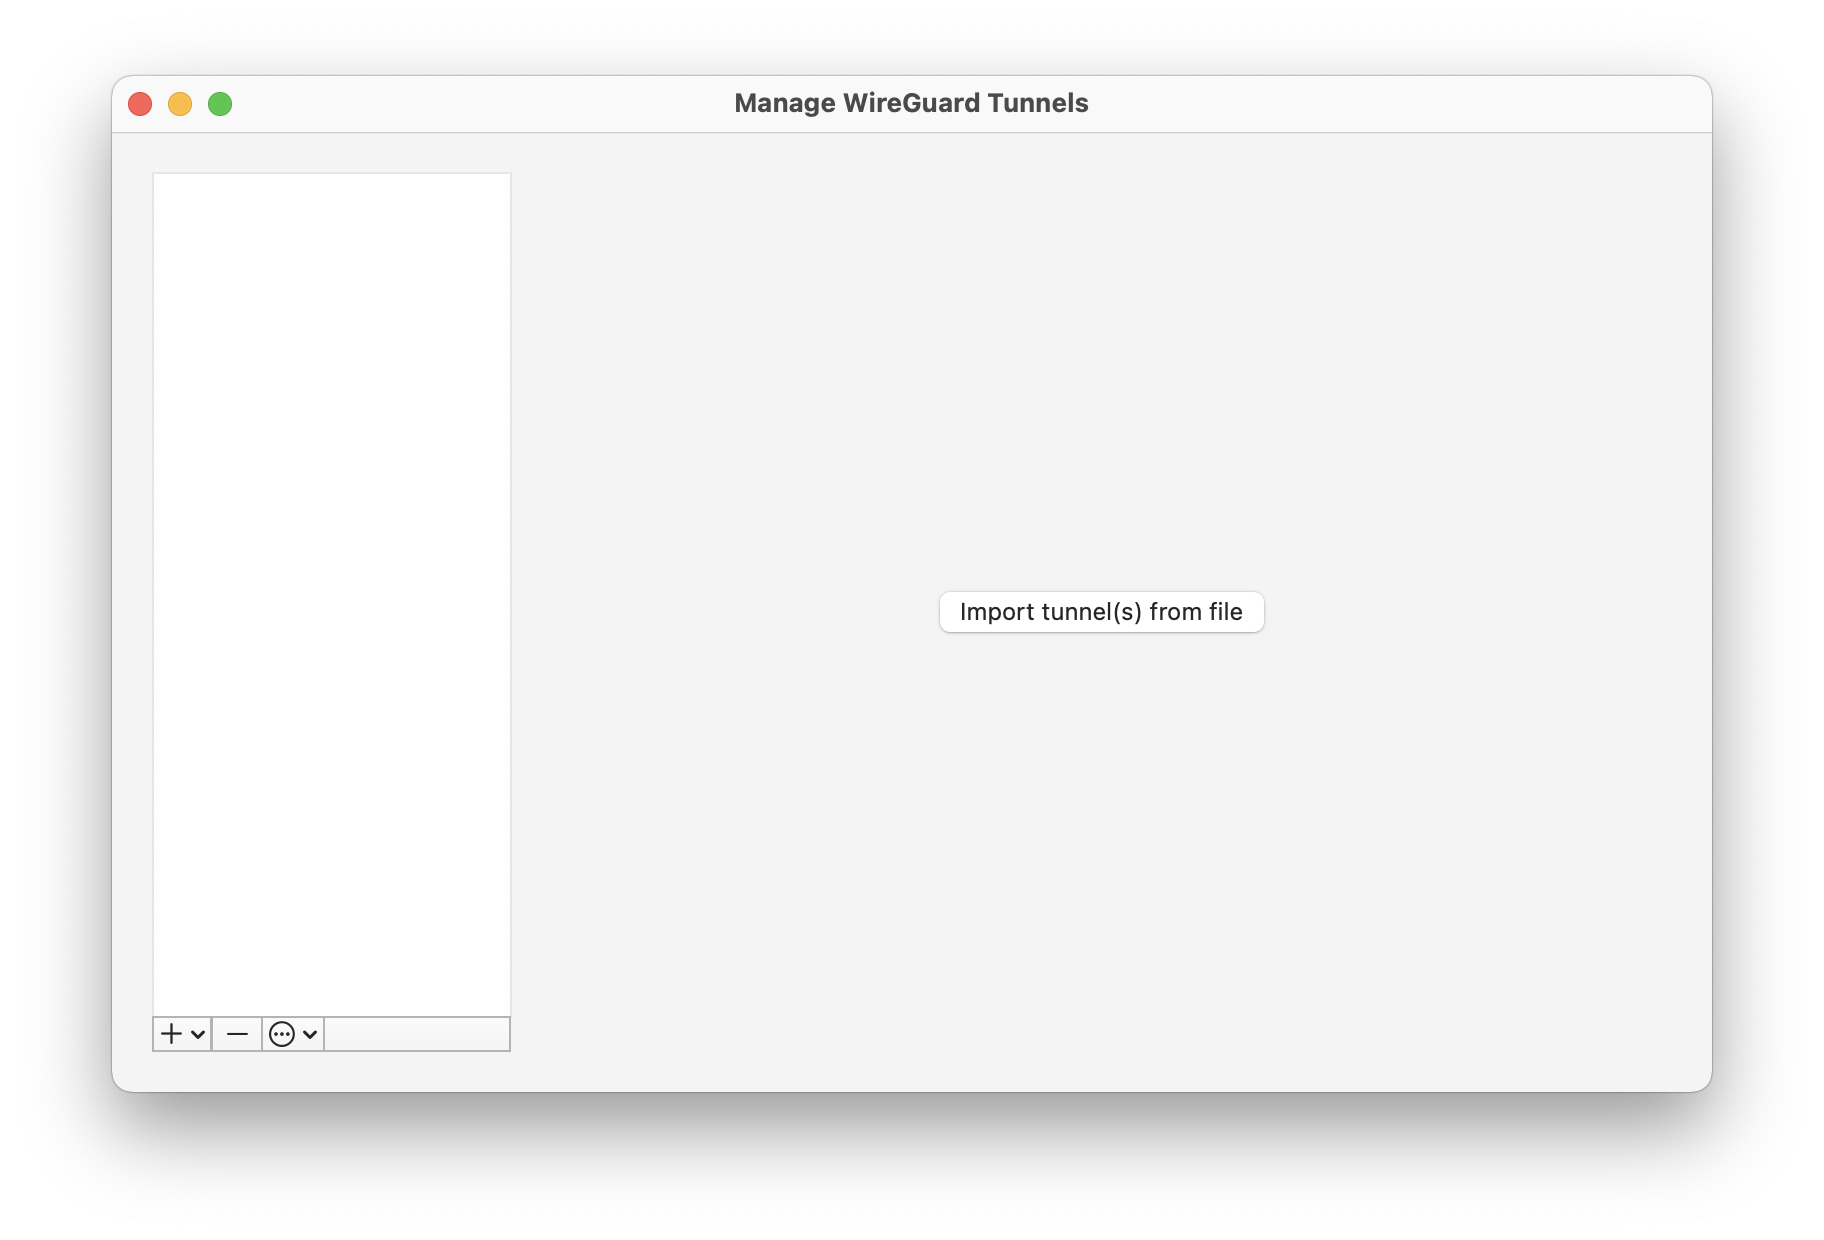
Configuring the Server
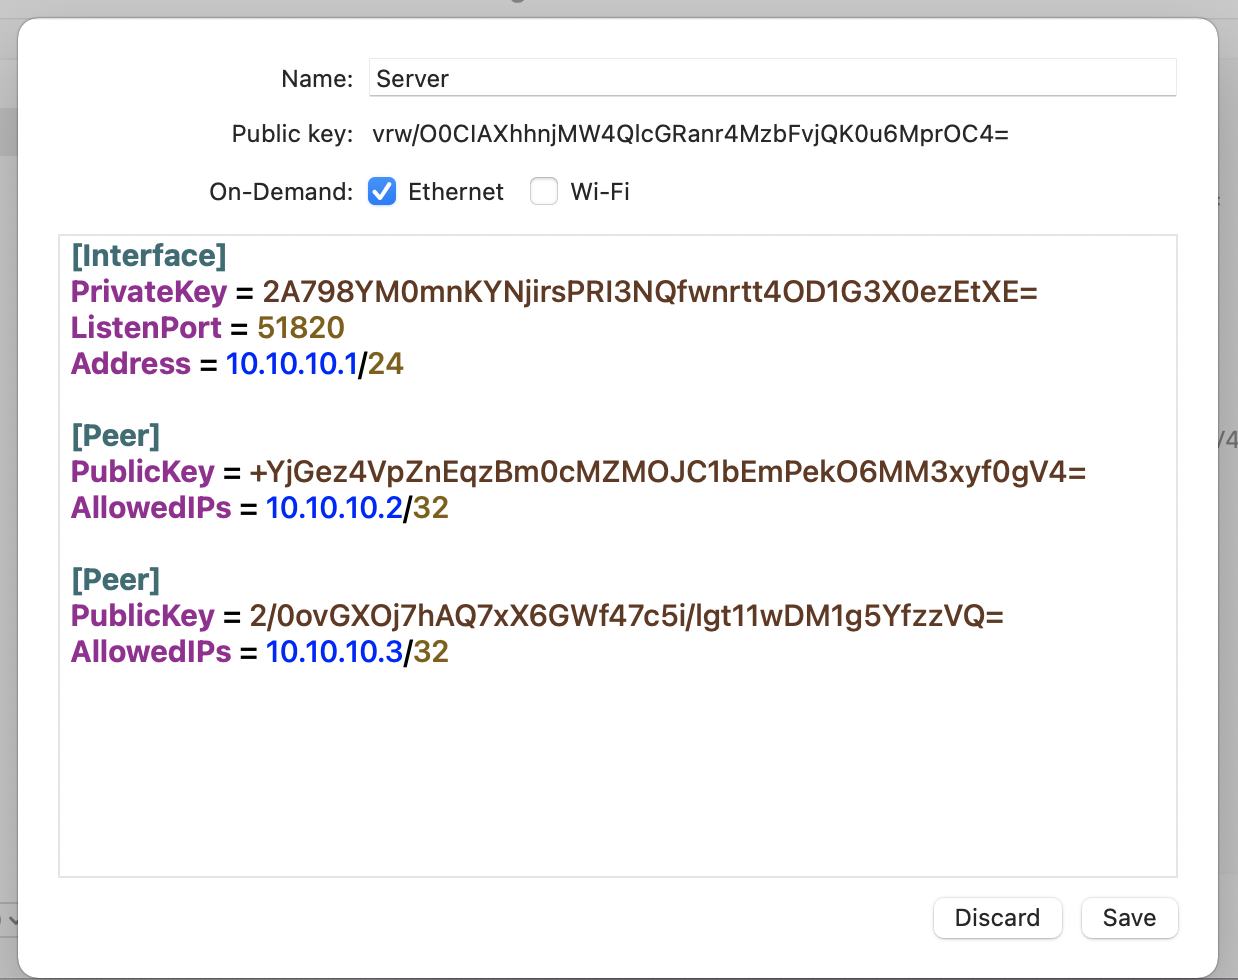
To set up your configuration, click on the + button in the bottom left corner and select Add Empty Tunnel.... You will see a text field containing a [Interface] section and a pre-generated PrivateKey. This key will be uniquely yours and should never leave the system. The Public Key is derived from your Private Key and will be used by clients to authenticate the server.
- Enter a name for this connection. It can be anything.
- If you want your VPN server to start up automatically on boot, select
On-DemandforEthernet. This will automatically enable this tunnel once connected to ethernet. - Append the following lines to the configuration file:
ListenPort = 51820
Address = 10.10.10.1/24
ListenPort defines the port that the server will listen on and that it will be publicly reachable by. You can adjust this port as you like. Make sure to allow incoming UDP connections for this port through the Firewall, otherwise all connection attempts will be blocked. Learn more about using the OakHost Firewall.
Address will be the IP address of this server within the virtual network it will create. /24 defines the subnet size of the network. With this configuration, 10.10.10.1 will be the IP of the server. Clients connecting to it through the VPN will be assigned IP addresses within 10.10.10.2 - 10.10.10.254. Of course, this can also be adjusted.
- For each client that should connect to this VPN, add the following three lines:
[Peer]
PublicKey = xxxx
AllowedIPs = 10.10.10.x/32
[Peer] indicates that the following lines should refer to a client connecting to the server.
PublicKey needs to be the Public Key of a given client. You can find this key later on when configuring the client and needs to be linked to the Private Key of that client. This ensures that only these two devices will be able to communicate with each other. Think of it as a password.
AllowedIPs defines which IP(s) can be assigned to this specific client. In our case, this should only be this one address (therefore /32) and it should increase with every client, so that no two clients get the same IP address.
These lines can be repeated indefinitely for each new client, and can be extended later on. We recommend creating a client for each device that should connect to the server. Take a look at this example:
- Save the tunnel configuration.
- If not already happened, start the server by pressing the
Activatebutton.
Configuring the Client
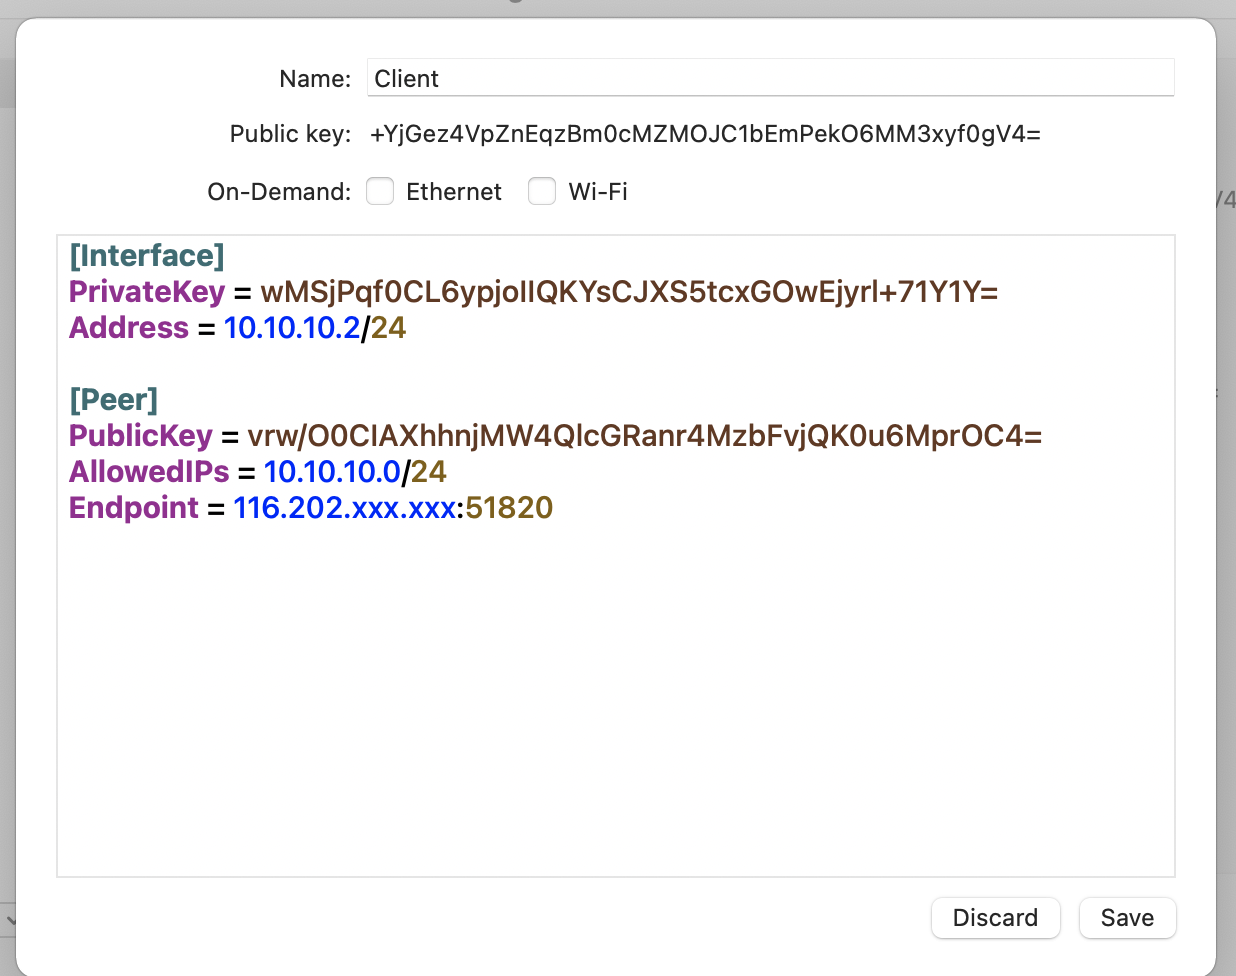
On the client device(s), download the WireGuard app through the App Store or from the official website. Once started, create a new tunnel just like before.
-
Note that this too has a Private and a Public key pair generated. The
Public Keyneeds to be added to the server configuration in the[Peer]section. -
Append
Address = 10.10.10.x/24to the configuration file. Fill in x with the IP address defined in the corresponding[Peer]section on the server. Note however that the subnet mask is set to/24here, instead of/32on the server side. This is intentional. -
Now, add a
[Peer]section to the client configuration. This now defines the server that the client will be connecting to. It consists of the following lines:
[Peer]
PublicKey = vrw/O0CIAXhhnjMW4QlcGRanr4MzbFvjQK0u6MprOC4=
AllowedIPs = 10.10.10.0/24
Endpoint = 116.202.140.164:51820
PublicKey is the Public Key that is shown on the server configuration screen.
AllowedIPs lists all IP ranges that should be sent through the WireGuard VPN tunnel. It should contain the IP network of the internal WireGuard network.
Endpoint defines the IP or hostname of the server, as well as the port used to connect to it. This should match the public address of your server, as well as the port you defined in your server configuration file.
Once completed, your configuration file should look something like this. Please make sure that all public keys match between the server and client side. Otherwise the connection will not be successful.
- Start the client by saving the configuration and pressing the
Activatebutton. - To ensure everything is working properly, try pinging the server by issuing the following command on the terminal:
ping 10.10.10.1
Troubleshooting and Tips
How do I share configuration files?
If you do not want to jump around exchanging public keys with your clients, you can generate key pairs and configuration files using the command line tool or by creating the configuration files on the server and exporting them.
Why can't my client connect?
Please check the following most common errors:
- The server is not running. Ensure the tunnel is active.
- The port is blocked by the firewall. Make sure the firewall has an exception defined for this port. The protocol needs to be set to
UDP. - Ensure all public key references are correct between the client and the server. They need to match exactly, otherwise a connection will fail.
- Ensure the IP addresses and allowed IP ranges are defined correctly. Check if there's a problem with the subnet mask being wrong.