Installing and connecting to NoMachine on macOS
In this tutorial we will be looking at how to connect to your macOS device using NoMachine.
Please note that this tutorial is tailored to customers of OakHost, but it should work for everyone using macOS.
Prepare your Mac
Download NoMachine
- Use the Customer Panel to connect to your Mac mini through KVM, in order to initially configure NoMachine server.
- Download NoMachine from the official website by navigating to: https://www.nomachine.com/download/download&id=7
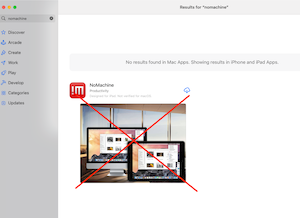
Do not download NoMachine from the AppStore. This is only the iOS version which does not include the NoMachine Server. You can however use this version to connect to your device later on.
- Once the download is finished, open it and double click to install. You will be prompted to click on
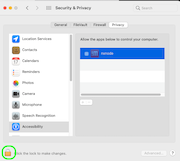
Open System Settings. Unlock it by clicking the lock icon in the bottom left and allownxnodeto control the computer. You will be asked to give permission twice.
- You can safely ignore the failure for installing the Kernel extension, NoMachine will still work fine.
- As the installation is finished, a small icon in the top right of the taskbar shows you, whether NoMachine is running.
![]()
- Thats it! You can now close the KVM connection and proceed with the Firewall and client configuration.
Configure your Firewall to accept a connection with "NoMachine"
In case you are using a firewall, you need to allow access to the NoMachine port. Otherwise the connection will fail.
- Go to your OakHost Customer Panel, select your Server and go to the
Firewalltab. Add a new customInbound Rule:
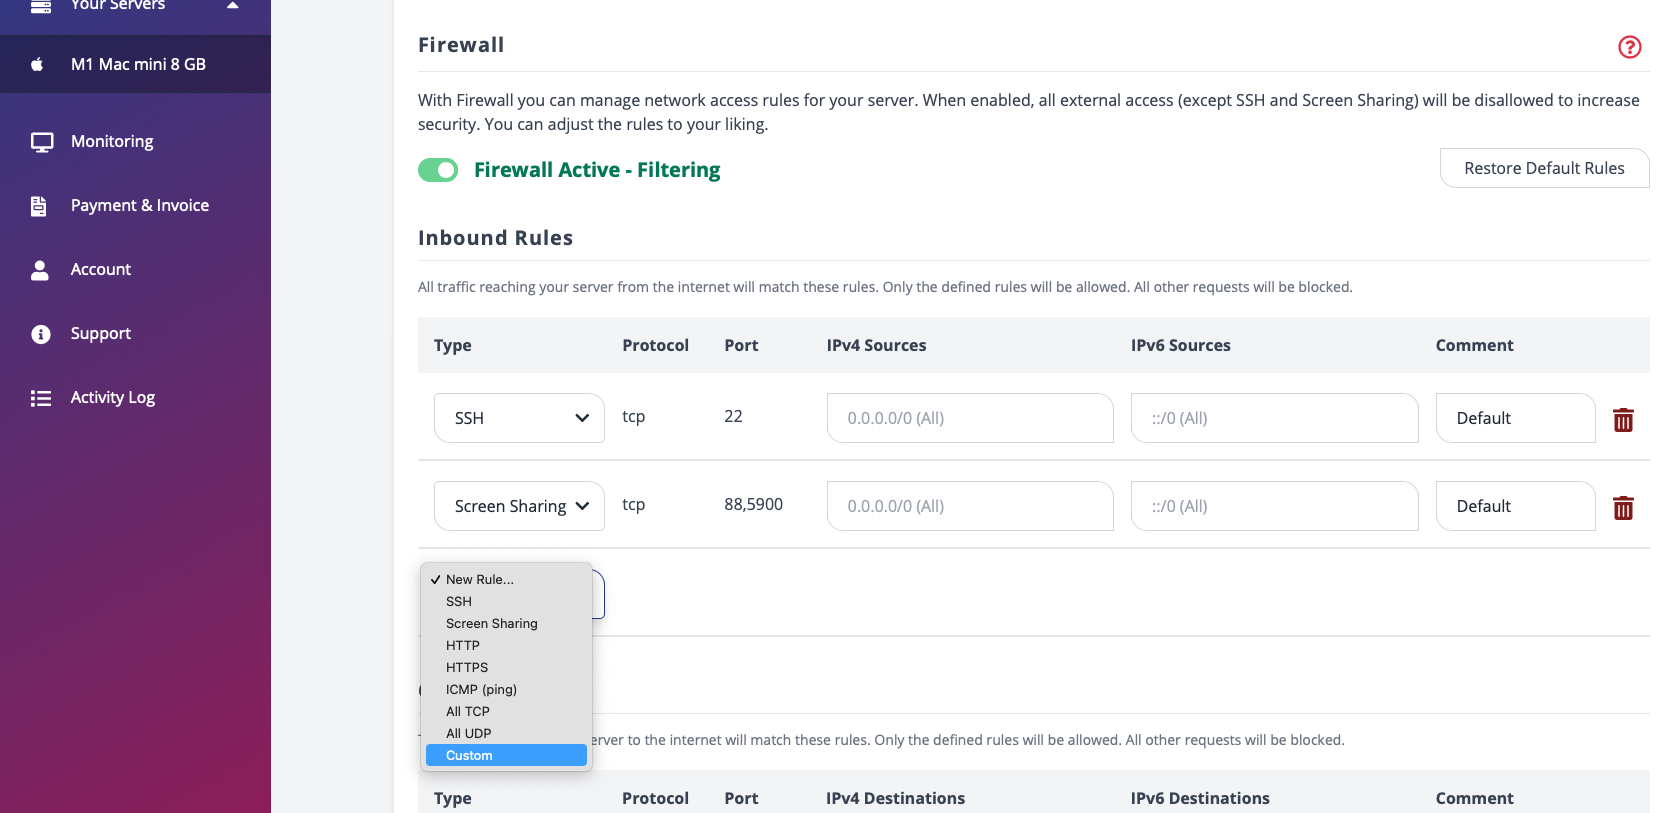
- Select
Customwith ProtocolTCPand Port4000. Scroll down and clickApply Changes. You should end up with this:
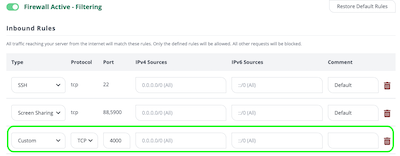
- Your firewall changes are now active and allow you to access NoMachine.
Configure your Client
To connect to your newly configured Mac, switch to your Windows or Linux computer or your tablet and download and install NoMachine.
This is pretty easy, as no configuration is needed. NoMachine will work with default settings. If you need help, there are a lot of tutorials on how to download and install it for Windows and Linux available on the web. NoMachine will present you a small tutorial during startup.
Add a new connection
- Click on
New Connectionand give your connection a name as you like. In theHostfield fill in the IP address of your Mac. You can find it in the OakHost Customer Panel.
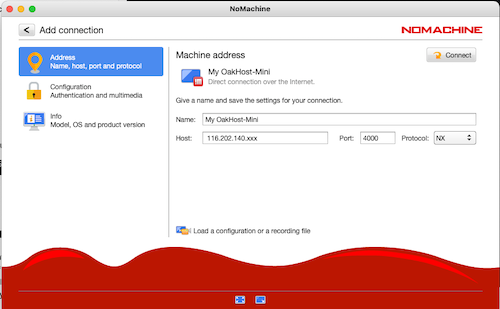
- Leave all settings as they are. (Port 4000 Protocol: NX)
- Click
Connectand you will be asked for the login credentials. Use the login credentials provided by OakHost and enjoy the smooth and fast connection with NoMachine!
Troubleshooting
After macOS update, connection is no longer possible
This is probably due to a missing permission in the system preferences. Go to "System Settings" -> "Security & Privacy" and select the tab "Privacy" and check if the permission is set for "AEServer" and "nxnode".
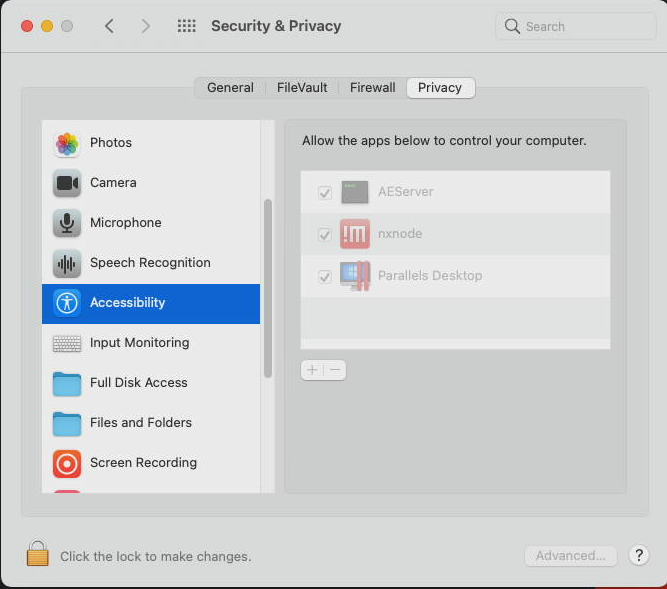
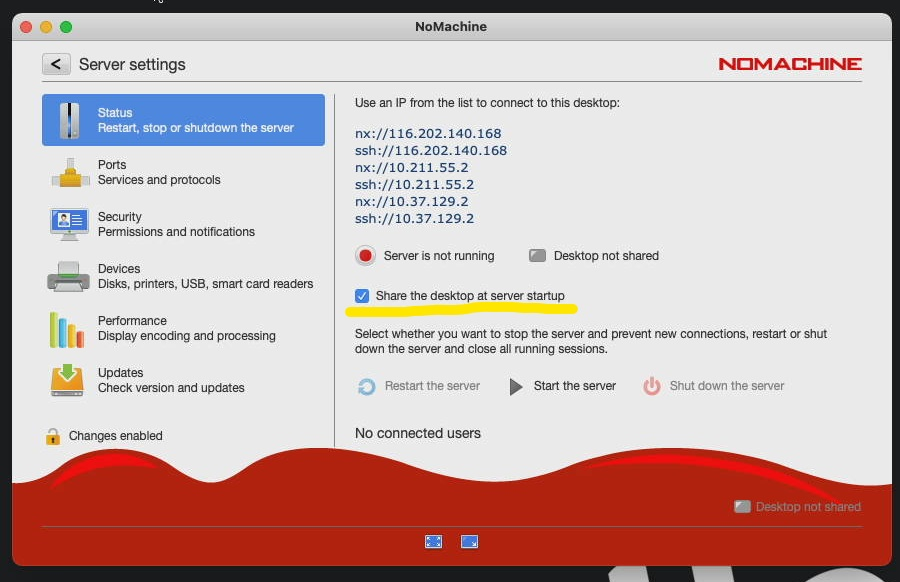
If the nxnode permission is not visible, open NoMachine and go to Settings -> Server -> Status, uncheck
Share the desktop at server startup and restart the server. Once the server status is green, check
Share the desktop at server startup and restart the server again. NoMachine will now ask you for the nxnode
permission. Activate it and you can connect to NoMachine again.