Enable SSO with Google Workspace
This guide walks you through configuring Google Workspace as your SAML2 identity provider for single sign-on (SSO) authentication.
Step 1: Create SAML Application in Google Workspace
- Log into your Google Admin Console
- Navigate to Apps > Web and mobile apps
- Click Add App > Add custom SAML app
- App name: Enter "OakHost" as the application name
- (Optional) Upload the OakHost logo
- Click Continue
Step 2: Configure OakHost SAML Settings
- Sign in to the OakHost Customer Panel and navigate to
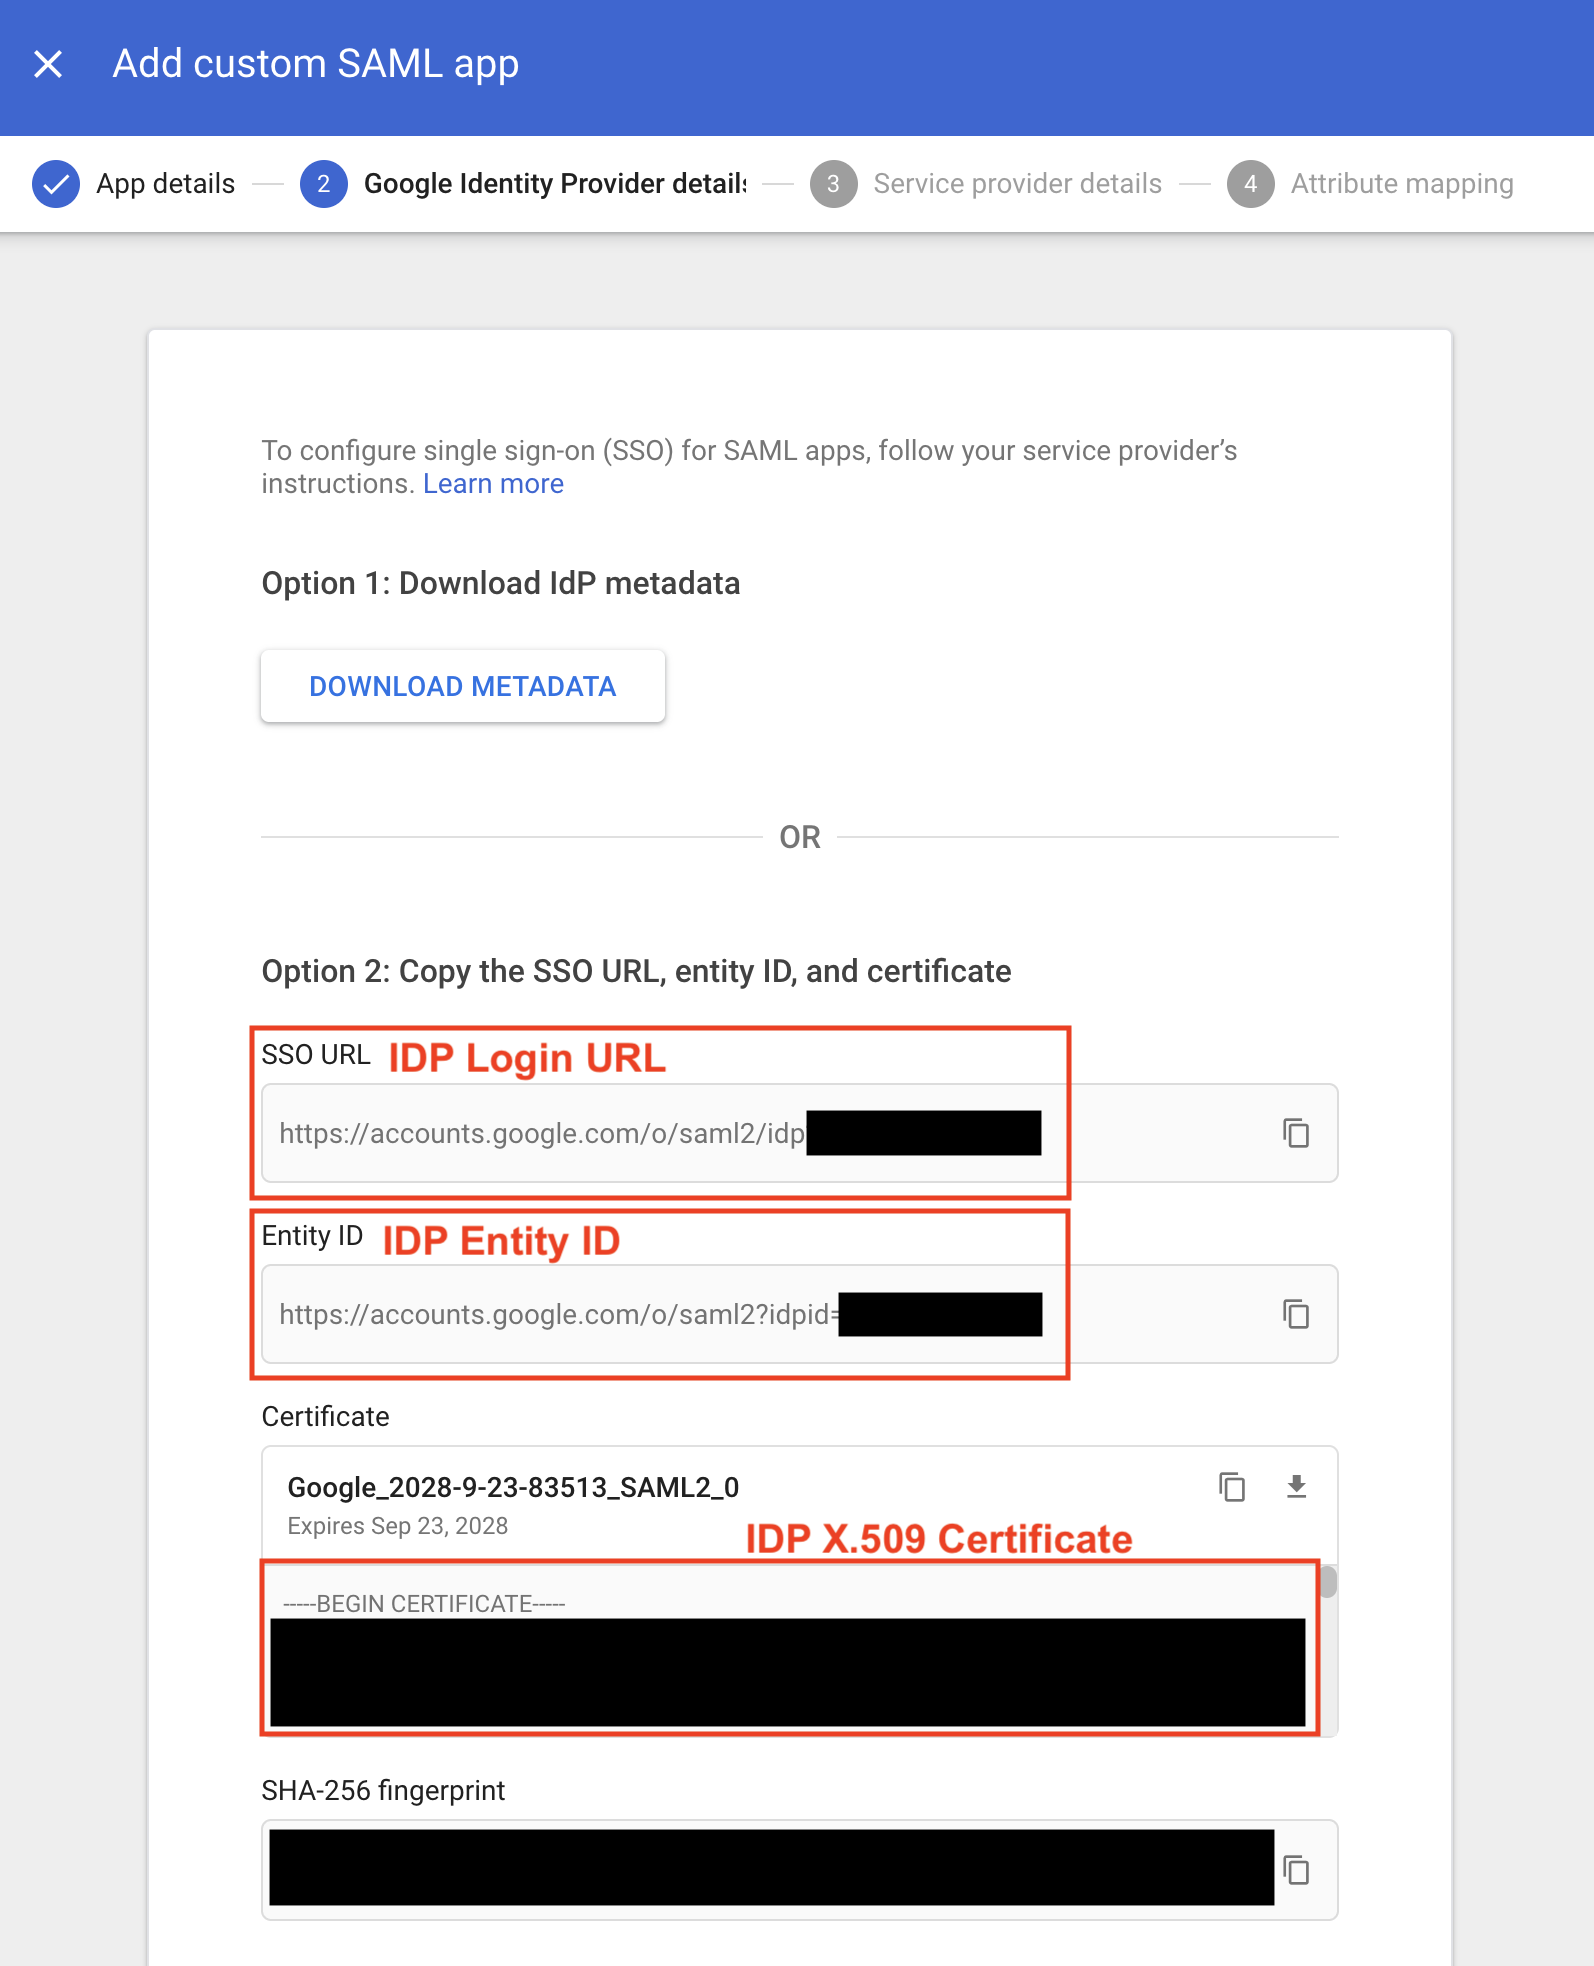
User Management>Manage SSO. - Copy the following values from the Google Identity Provider details page and paste them into the OakHost Customer Panel:
- SSO URL: Corresponds to
IDP Login URL - Entity ID: Corresponds to
IDP Entity ID - Certificate: Copy the text starting with
-----BEGIN CERTIFICATE-----and paste it into theIDP X.509 Certificatefield - IDP Logout URL: Use
https://www.oakhost.netas the logout URL
- SSO URL: Corresponds to
- Click Create Configuration in the OakHost Customer Panel.
- Click Continue on the Google Admin page to proceed to the next step.
Step 3: Configure Google SAML Settings
- On the Service Provider details page, copy the values provided in the OakHost Customer Panel for
ACS URL,Entity IDandName ID format:
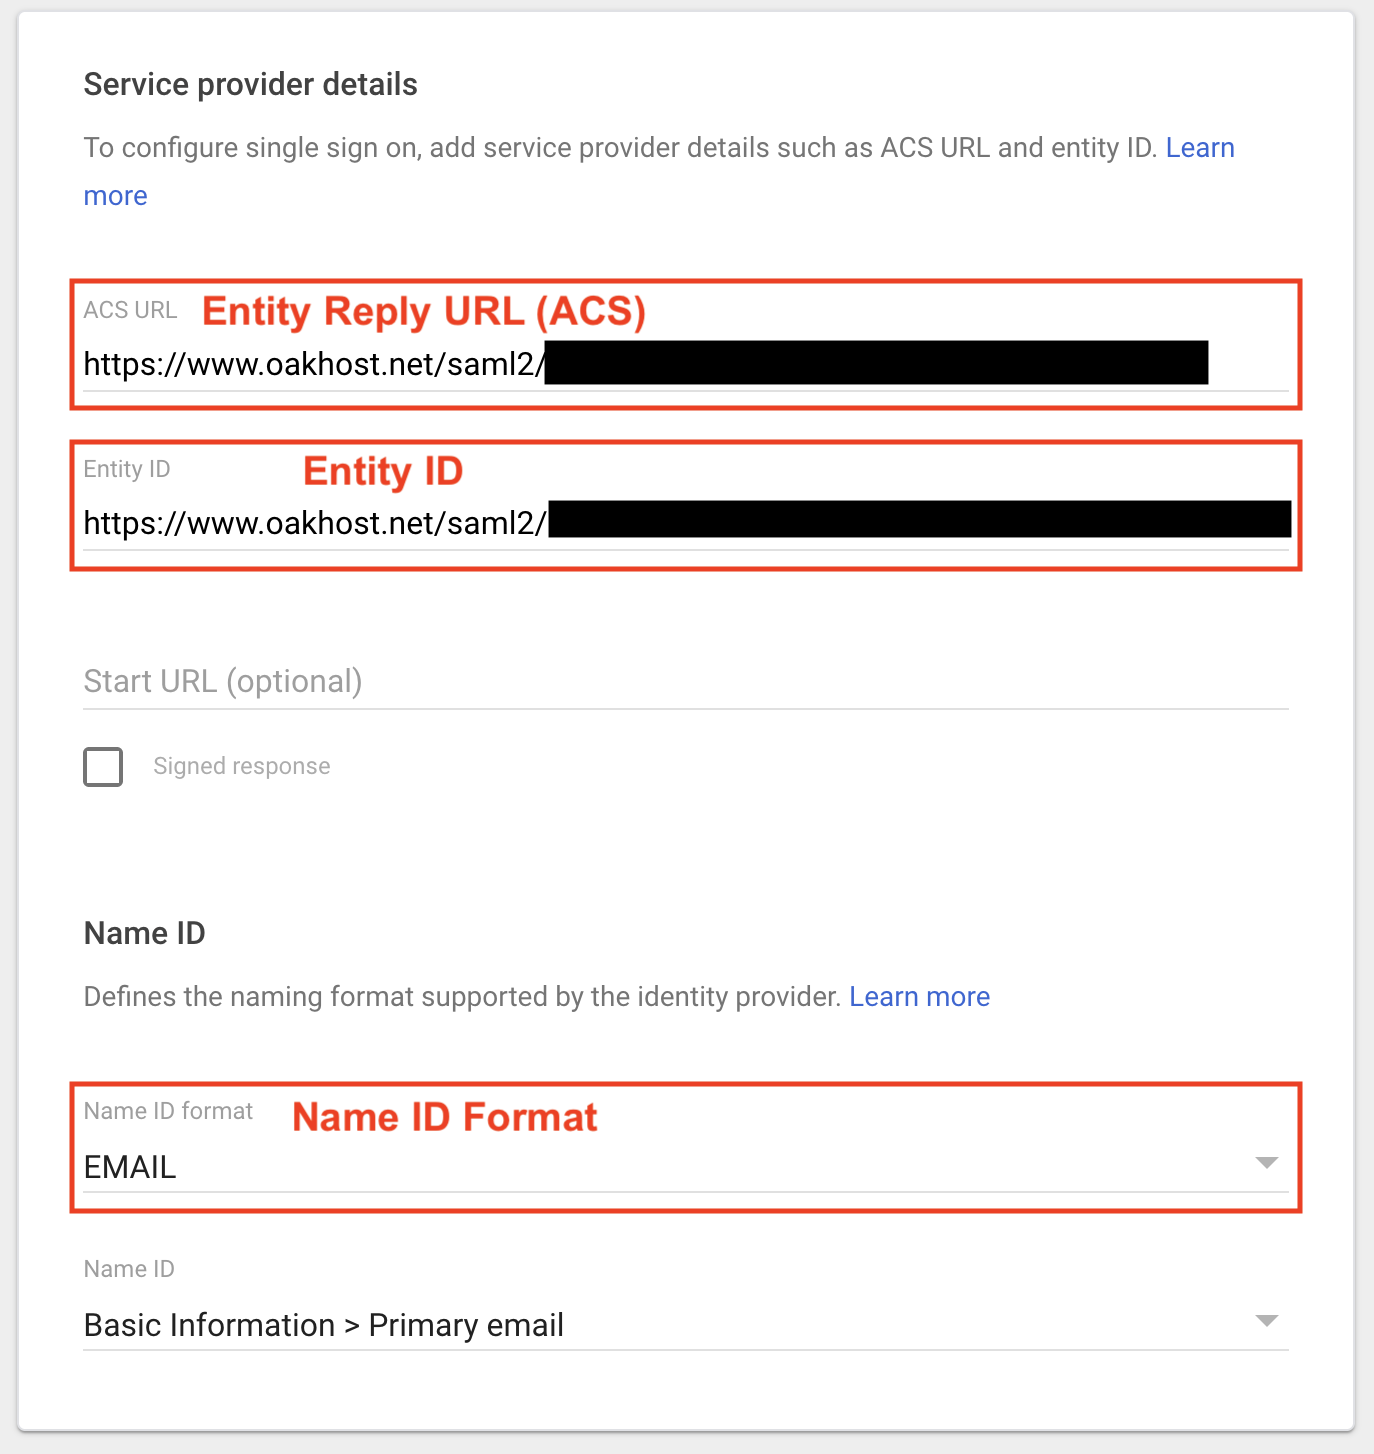
- Click Continue.
- On the Attribute Mapping page, no attributes are required. Click Finish to complete the setup.
Step 4: Test Integration
The SSO configuration is now complete. You can test the integration by logging out of the OakHost Customer Panel. On the login screen, enter your email address and click Sign in via SSO. You will be redirected to Google for authentication.